# API Authentication
Source: https://docs.medwrite.ai/api-reference/api-authentication
API key and bearer token for MedWrite API access
API access uses two credentials together:
* **API Key** Identifies the integrating system. Provided by the medWrite team during onboarding and sent as a request header.
* **Bearer Token** Identifies the authenticated user. Obtained by calling the login endpoint with valid user credentials and the API key. The token is then sent in the `Authorization` header on all subsequent requests.
The login endpoint returns a bearer token and an expiration timestamp. The integrating system should track expiry and re-authenticate before the token expires to avoid interruption.
A validation endpoint is available to check whether a token is still valid without making a data request.
For the login endpoint, credentials, and API key, contact the **medWrite team**.
## Best practices
* Store tokens securely; never expose them in client-side code or logs.
* Do not share tokens across user sessions.
* Re-authenticate proactively when the token is close to expiry.
## Next steps
Embed MedWrite in your EHR.
Retrieve approved letters (FHIR Bundle).
# Embedded Authentication
Source: https://docs.medwrite.ai/api-reference/embedded-authentication
Embed MedWrite in your EHR with URL-based authentication
MedWrite can be embedded inside an Electronic Health Record (EHR) system so clinicians can use it within their existing workflow.
## Architecture
The integration uses a URL-based embedding pattern. The EHR opens MedWrite by loading specific URLs in an embedded frame and passes patient context and authentication as parameters.
```
EHR Application
|
|-- Embedded Frame
|
|-- MedWrite Frontend
|
|-- Authenticated via token passed from EHR
|-- Patient context passed via URL parameters
```
## How it works
1. The clinician logs into their EHR as normal.
2. The EHR backend obtains a MedWrite bearer token via the login API on behalf of the user.
3. The EHR renders an embedded frame pointing to the MedWrite frontend, passing the token and patient identifiers as URL parameters.
4. MedWrite authenticates the session and shows the relevant patient view.
The embedded frame runs in its own browsing context, isolated from the host EHR. The MedWrite server is configured to allow framing only from authorised EHR domains. Tokens in the embedded context use the same expiry and security rules as direct API access.
This pattern works with major EHR platforms including Epic Hyperspace and other web-based clinical systems.
The exact frontend URL, parameter format, and domain whitelisting are configured during onboarding. Contact the **medWrite team** for integration support.
## Next steps
API key and bearer token.
Retrieve approved letters.
# Introduction
Source: https://docs.medwrite.ai/api-reference/introduction
Overview of the MedWrite API and authentication
The MedWrite API lets you integrate with clinical documentation, letters, and HL7 messaging. This reference covers authentication, Get Records endpoints, and the HL7 Receiver.
## Authentication
All API and embedded access is secured with industry-standard authentication. Access is controlled through **API keys** and **JWT bearer tokens** so only authorized systems and users can call the platform.
* Tokens are time-limited and signed with RS256.
* Each session is scoped to a specific organisation; users can only access data for their authorised organisation.
* When a token expires, the integrating system must re-authenticate to obtain a new one.
For credentials, API keys, and onboarding, contact the **medWrite team**.
## What's in this reference
| Section | Description |
| ------------------ | -------------------------------------------------------------------------------------------- |
| **Authentication** | API authentication (API key + bearer token) and embedded authentication for EHR integration. |
| **Get Records** | Get approved outputs, mark output completed, get attachments, and get PDF documents. |
| **HL7 Receiver** | Send HL7 ADT messages and understand HL7 phases (admission, transfer, discharge, etc.). |
## Next steps
API key and bearer token for API access.
Embed MedWrite in your EHR with URL-based auth.
# Dashboard Filters
Source: https://docs.medwrite.ai/clinic-consultant-filters
Filter the dashboard by clinic or consultant
Filter the dashboard so you only see records or letters for a specific clinic or consultant. This helps when you manage multiple clinics or work in a team.
Filters for **clinic** and **consultant** are usually at the top of the dashboard or list view. Use the dropdowns or selectors to pick a clinic and optionally a consultant.
The list updates to show only records or letters that match the selected clinic and consultant. Clear the filters to see everything again.
## Date Filters
Use the date filter to show only records or letters within a certain period. This helps when you need to find something from a specific day or week.
The date filter is usually near the top of the dashboard or list. You can pick a date range (from and to) or use presets such as today, this week, or this month.
The list shows only items within the selected range. Clear or change the date to see a different period.
## Next steps
Switch between workflow statuses.
Filter by clinic or consultant.
## Next steps
Switch between in progress, approved, and other statuses.
Filter records or letters by date range.
# Date Filter
Source: https://docs.medwrite.ai/date-filter
Filter records or letters by date range
Use the date filter to show only records or letters within a certain period. This helps when you need to find something from a specific day or week.
The date filter is usually near the top of the dashboard or list. You can pick a date range (from and to) or use presets such as today, this week, or this month.
The list shows only items within the selected range. Clear or change the date to see a different period.
## Next steps
Switch between workflow statuses.
Filter by clinic or consultant.
# AI Workflow Setup
Source: https://docs.medwrite.ai/essentials/AI-workflow-setup
Create a new AI Assistant workflow and get started straight away.
The users with Assistant Writers role can access the AI Workflow setup screen where they create a new assistant from scratch.
Open **Assistant Library** from the Assistants menu, go to **My Assistants**, then click **Create New Assistant** to open AI Workflow Setup.”
In **Assistant Form**, complete the required fields (for example **Clinic, Speciality, Assistant Name, Output Type, and Instructions**) and save the assistant. Then open the **Context** tab to upload a file (optional) for context search. Finally, open the **Workflows** tab and assign the workflow(s) for this assistant.
## Next steps
View and manage your AI assistants.
Create New Record.
# Activate Your Account
Source: https://docs.medwrite.ai/essentials/activate-account
Activate your MedWrite account after registration
After you register, you need to activate your account before you can log in. Use the link sent to your email to activate.
Check the inbox for the email address you used to register. You will receive a message from MedWrite with an activation link.
Once you open the link, your account is activated. You can then log in to the dashboard or the mobile app.
## Next steps
Sign in to your MedWrite account.
Get the MedWrite mobile app.
# Add PDF Template
Source: https://docs.medwrite.ai/essentials/add-pdf-template
Add a PDF template for letter or document output
Add a PDF template from **Template Management**. After you choose organisation, template type, and optional clinic, you design the HTML layout and select **variables** so the right **patient and letter details** are inserted **dynamically** into each exported PDF.
In the templates or documents area, click **Add New Template** to start adding a PDF template.
Under **Clinic (optional)**, choose **Organisation template** or a specific clinic.
After you select organisation, template type, and optional clinic, the **HTML Content Editor** opens. Use the HTML to control **layout and styling** (headings, tables, branding). Add **placeholders** in the markup for any **dynamic** details you want in the final PDF (patient name, dates, letter text, and other fields). Open **Variables**, tick the **dynamic fields** you want MedWrite to merge for this template, and keep them aligned with your HTML. Use **Run** to preview (you can add sample **context data** for testing). When the design is correct, **Publish Template** to save it for live letters.
## Next steps
Create and manage letter and document templates.
Add a Word template for letter output.
# Add Word Template
Source: https://docs.medwrite.ai/essentials/add-word-template
Add a Word template for letter or document output
Add a Word template from **Template Management**. After you choose organisation, template type, and optional clinic, you design the HTML layout and select **variables** so the right **patient and letter details** are inserted **dynamically** into each exported PDF.
In the templates or documents area, click **Add New Template** to start adding a Word template.
Select **Organisation** and **Template type**. Under **Clinic (optional)**, choose **Organisation template** or a specific clinic.
After you select organisation, template type, and optional clinic, the **HTML Content Editor** opens. Use the HTML to control **layout and styling** (headings, tables, branding). Add **placeholders** in the markup for any **dynamic** details you want in the final PDF (patient name, dates, letter text, and other fields). Open **Variables**, tick the **dynamic fields** you want MedWrite to merge for this template, and keep them aligned with your HTML. Use **Run** to preview (you can add sample **context data** for testing). When the design is correct, **Publish Template** to save it for live letters.
## Next steps
Create and manage letter and document templates.
Create an AI assistant that uses your templates.
# Contact Directory
Source: https://docs.medwrite.ai/essentials/address-lookup
Store, search, and reuse the people you send clinical letters to.
The **Contact Directory** (Address Book) stores the people you send clinical letters to, so you can reuse them on every letter. It connects directly to the recipient lookup on the "**Send"** screen add a recipient by name, email, or specialty instead of typing an address each time.
The Contact Directory is available when your organisation has **letter email sending** enabled. If you don't see it in the navigation, ask your MedWrite administrator.
**Open the Contact Directory**
From the top navigation, select **Contact Directory**. The page has three tabs:
**Search Existing Contact**, **Register New Contact**, and **Upload New Contacts**
**Search for a contact**
Type a **name, email, or specialty**, then filter by specialty or sort the results.
On a contact card, press **Edit** to update its details.
**Register a new contact**
On **Register New Contact**, enter the required fields: **Name**, **Email**, and **Specialty**, plus any optional details, then press **Save Contact**.
**Upload contacts in bulk**
On **Upload New Contacts**, download the **Template**, then drag in a **CSV** or **.xlsx** file. Review the preview, fix any highlighted rows, and press **Review & Import**.
Contacts are labelled **Internal** or **External**, and each email can exist only once in the directory.
**Use contacts when sending a letter**
On the letter **Send** screen, the **To**, **CC**, and **BCC** fields each search the directory as you type, pick a contact to add it. If someone isn't found, press **Add to directory** to save them and add them to the recipient in one step.
Users can also add new contacts directly during the email sending process. If an email address entered into any of the **To**, **CC**, or **BCC** fields does not already exist in the address book, the system will prompt the user to create a new contact. Alternatively, users can select the **Add Email** button below the recipient fields to manually add a new contact before sending the email.
## Next steps
Review, clinically approve, and export your letter.
Mark letters as clinically approved before sharing or sending.
# Approve Records
Source: https://docs.medwrite.ai/essentials/approve-records
Clinically approve records from the mobile app
You can approve records and letters from the mobile app. Review the content on your device and tap **Clinically approve** when you are happy with it.
Open a record or letter in the app to review the content. When it is ready, use **Clinically approve** to mark it as approved.
The approved letter is available for export or email from the dashboard. You can also export from the app if that option is available.
## Next steps
Review records and letters on the mobile app.
Search for records or letters on the mobile app.
# #Issue 4 - Apr Changelog
Source: https://docs.medwrite.ai/essentials/april-2026
New features and improvements
## Feature Highlights
Clinicians can now attach documents directly from the recording screen so the AI generates letters with full patient context. Ambient listening automatically reconnects through network interruptions, and clinic-level BCC settings allow administrators to route discharge emails to shared mailboxes automatically.
## New Features
Attach patient-specific documents — including GP referral letters, external imaging reports, and prior clinical notes — directly from the recording screen. The AI uses these files as additional context when generating clinical letters, producing more accurate and complete documentation.
If your connection drops briefly during patient note capture, the system automatically reconnects without losing transcription progress. This reduces manual retries and improves reliability during consultations.
## Improvements and Fixes
Administrators can now configure a BCC email address for each clinic. All discharge letter emails sent from that clinic automatically copy the configured address, supporting compliance archiving requirements and shared mailbox workflows.
Dashboard tabs now load data on demand instead of fetching everything at once. Clinics with high patient volumes will experience noticeably faster page loads, particularly when switching between tabs.
The execution time window for AI agents has been extended. Complex clinical forms and longer documents can now generate successfully without timing out, particularly multi-section discharge summaries and detailed referral letters.
# Assign User Roles
Source: https://docs.medwrite.ai/essentials/assign-user-role
Assign roles to users in your organisation
Roles control what users can do in MedWrite (for example create records, approve letters, or manage organisation settings). Assign the right role so each user has the access they need.
In user management, you can viewuser's name, email role, and Groups.
The user's permissions update straight away. You can set the permissions for each role in Workflow management.
## Next steps
Add a new clinic to your organisation.
Create groups and manage organisation.
# Assistant Library
Source: https://docs.medwrite.ai/essentials/assistant-library
Browse public assistants and manage assistants for your clinic.
Users with the **Assistant Writer** role can open **Assistant Library** to browse the **Public Library**, add assistants for their clinic, and manage **My Assistants** (including favourites and publishing drafts).
From the profile menu, open **Assistants** → **Assistant Library**. The page shows **Assistant Library** and the line *Browse and add assistants to your clinic*.
Select the **Public Library** tab. Use **Select Speciality** and **Search by Name** to narrow the list. Change **rows per page** if needed and use the pagination controls at the bottom to move through results. Add assistants from here so they can be used for your clinic (follow the actions on each card).
Select the **My Assistants** tab. Favourites appear at the top. The table lists Name, Type, Category, Status, and Actions. Use Add from Library to bring in more assistants from the public list, or Create New Assistant to open AI Workflow Setup. When Draft mode is enabled, edits create a draft copy; clinicians are not affected until you Publish, as shown in the banner on this screen.
## Next steps
Create a new assistant workflow from scratch.
View and manage assistants for your organization.
# Clinical Approval
Source: https://docs.medwrite.ai/essentials/clinical-approval
Review and clinically approve letters before sharing or sending
Clinical approval is the step where you confirm that a letter is correct and ready to send. Only approved letters can be exported or shared.
After you review the letter on the letter page, use **Clinically approve** to mark it as approved.
After clinical approval of the assistant’s output, you can export the generated content as a PDF or Word document.
Approved letters appear in a dedicated area on the dashboard. From there you can export them as PDF or Word or send them by email.
## Next steps
Mark a record or letter as complete when you have finished with it.
Send approved letters by email from the dashboard.
# Create Clinic
Source: https://docs.medwrite.ai/essentials/create-clinic
Add a new clinic to your MedWrite organisation
Add a clinic so your team can create records and letters under that clinic. Each clinic can have its own settings and templates.\
\
Clinics are used to separate different records into sections, and can be filtered from the dashboard.
Clinics are also used to organise and seperate your workflows.
From the dropdown beside your username, choose Create Clinic. Enter the clinic name and any details your organisation requires (for example location or code), you can also add BCC Emails (optional).
You will then assign the clinic to groups. Anyone who is a member of an assigned group will get access to the clinic
The new clinic appears in your organisation. You can assign users and consultants to it and start creating records for that clinic.\
The "Clinic Code" is only used for certain configurations, like if you have the patient manager or Email add ons they are organised using the clinic code.
## Next steps
Create a group to organise users or consultants.
Assign roles to users in your organisation.
# Create Group
Source: https://docs.medwrite.ai/essentials/create-group
Create a group to organise users or consultants in your organisation
Groups let you organise users or consultants (for example by department or role). You can then assign permissions or filter views by group.\
Users will be able to see each other's records when they're in the same group. If they are not in the same group, they won't be able to.
To create a group you need organisation admin permissions.
\
Click the Drop down beside your username and select the option to create a new group. Give the group a name and assign group admins.
Once a group exists, a group admin can assign users to it and use it to filter the dashboard (for example by consultant or team).
## Next steps
Add a new clinic to your organisation.
View and manage patient information.
# Create Record
Source: https://docs.medwrite.ai/essentials/create-record
Create a new clinical record from the dashboard and generate your letter
Create a record to capture a patient consultation and generate a letter. Follow the steps below from the dashboard to your first letter.
Open your MedWrite dashboard and select **New** to create a new record.
On the create letter screen you do **four** things:
* **Patient details** – Enter or select the patient.
* **AI Assistant** – Choose the assistant that matches your clinic or letter type.
* **AI Assistant Input** – Pick how to add the consultation:
* **Record** – Capture by voice. MedWrite transcribes and structures the content.
* **Manual input** – Type or paste your notes into the form.
* **Reference Files (optional)** – Upload supporting files for extra AI context before generating the letter.
After you finish the record, you are taken to the letter page. There you can review, edit, and approve the generated letter before sharing or sending.
Choose the assistant that matches your clinic or letter type so the output follows your templates and style.
## Next steps
Review, clinically approve, and export your letter as PDF or Word.
Mark letters as clinically approved before sharing or sending.
# Download the App
Source: https://docs.medwrite.ai/essentials/download-app
Get the MedWrite mobile app for recording on the go
The MedWrite mobile app lets you record consultations and manage records from your phone or tablet. Follow these steps to install and start using it.
Get the app from the App Store (iOS) or Google Play (Android). You can also use a link from the MedWrite website or your dashboard.
Install the app and open it. You will see the MedWrite login or welcome screen.
Log in with your MedWrite account. You can then record consultations, view records, and approve letters from your device.
Changes you make on the mobile app (new records, approvals, edits) sync with the web dashboard. You can switch between app and web and see the same data.
## Next steps
Activate your account after registration.
Record a consultation on the mobile app.
# #Issue 2 - Feb Changelog
Source: https://docs.medwrite.ai/essentials/february-2026
New features and improvements

## Feature Highlights
**Live Streaming** brings real-time transcription directly into your consultation workflow - dictate as you go and watch your letter build itself.
## 🚀 New Features
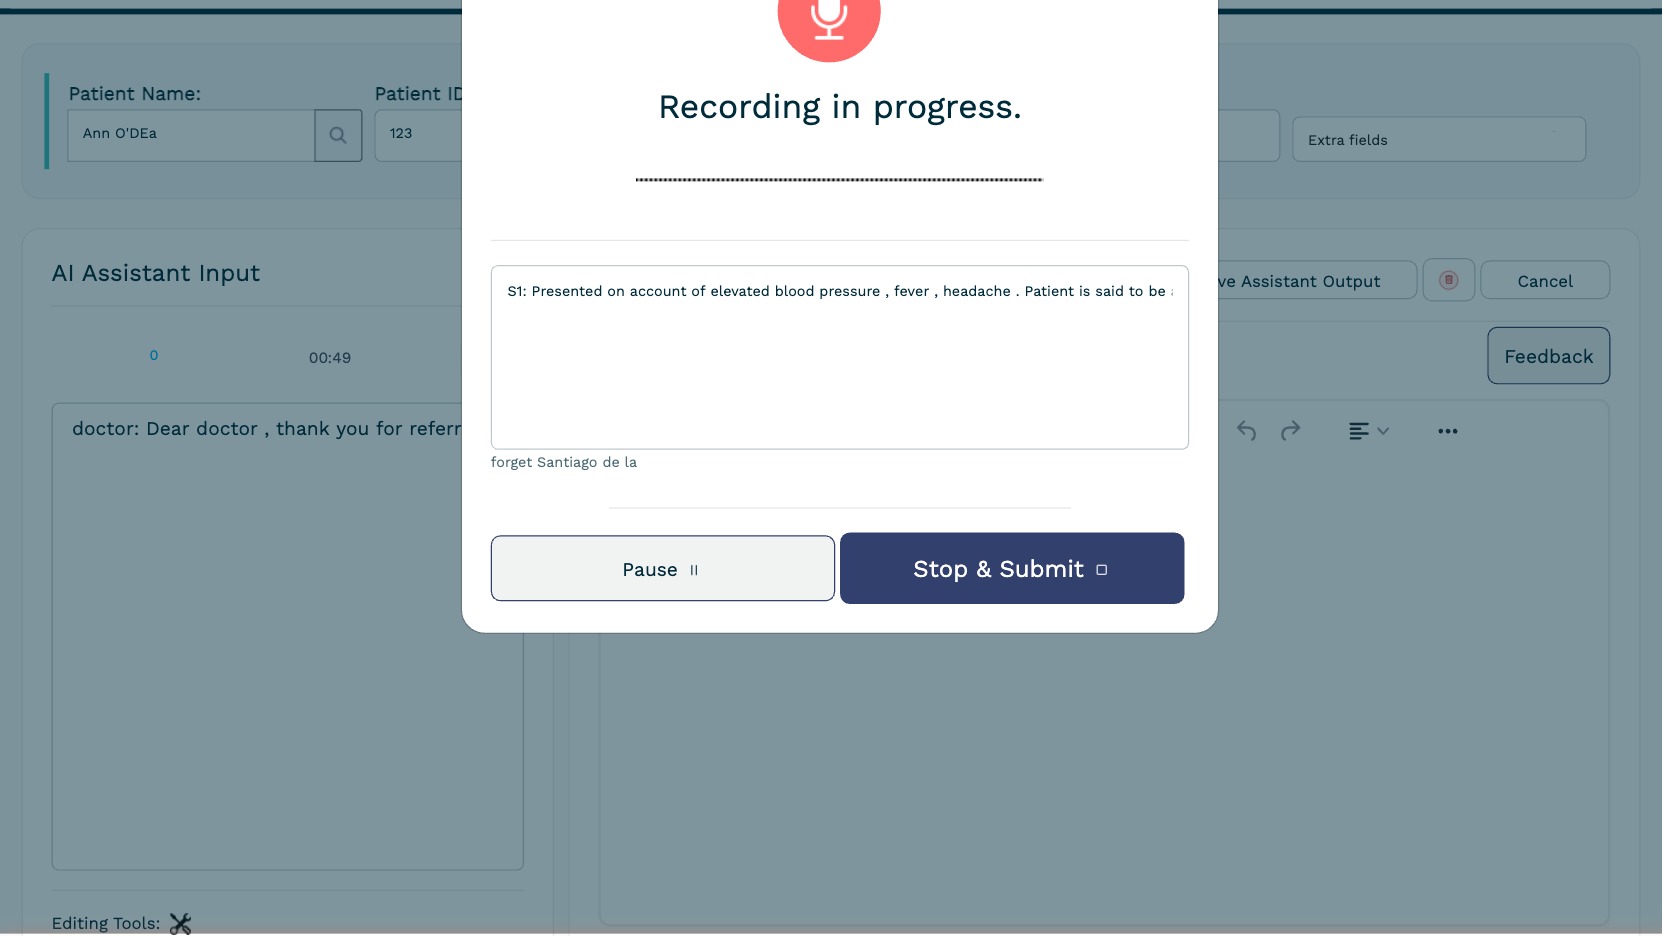
Real-time voice transcription that captures your consultation as it happens. Start recording and see your clinical notes form live — no need to wait until after the appointment.
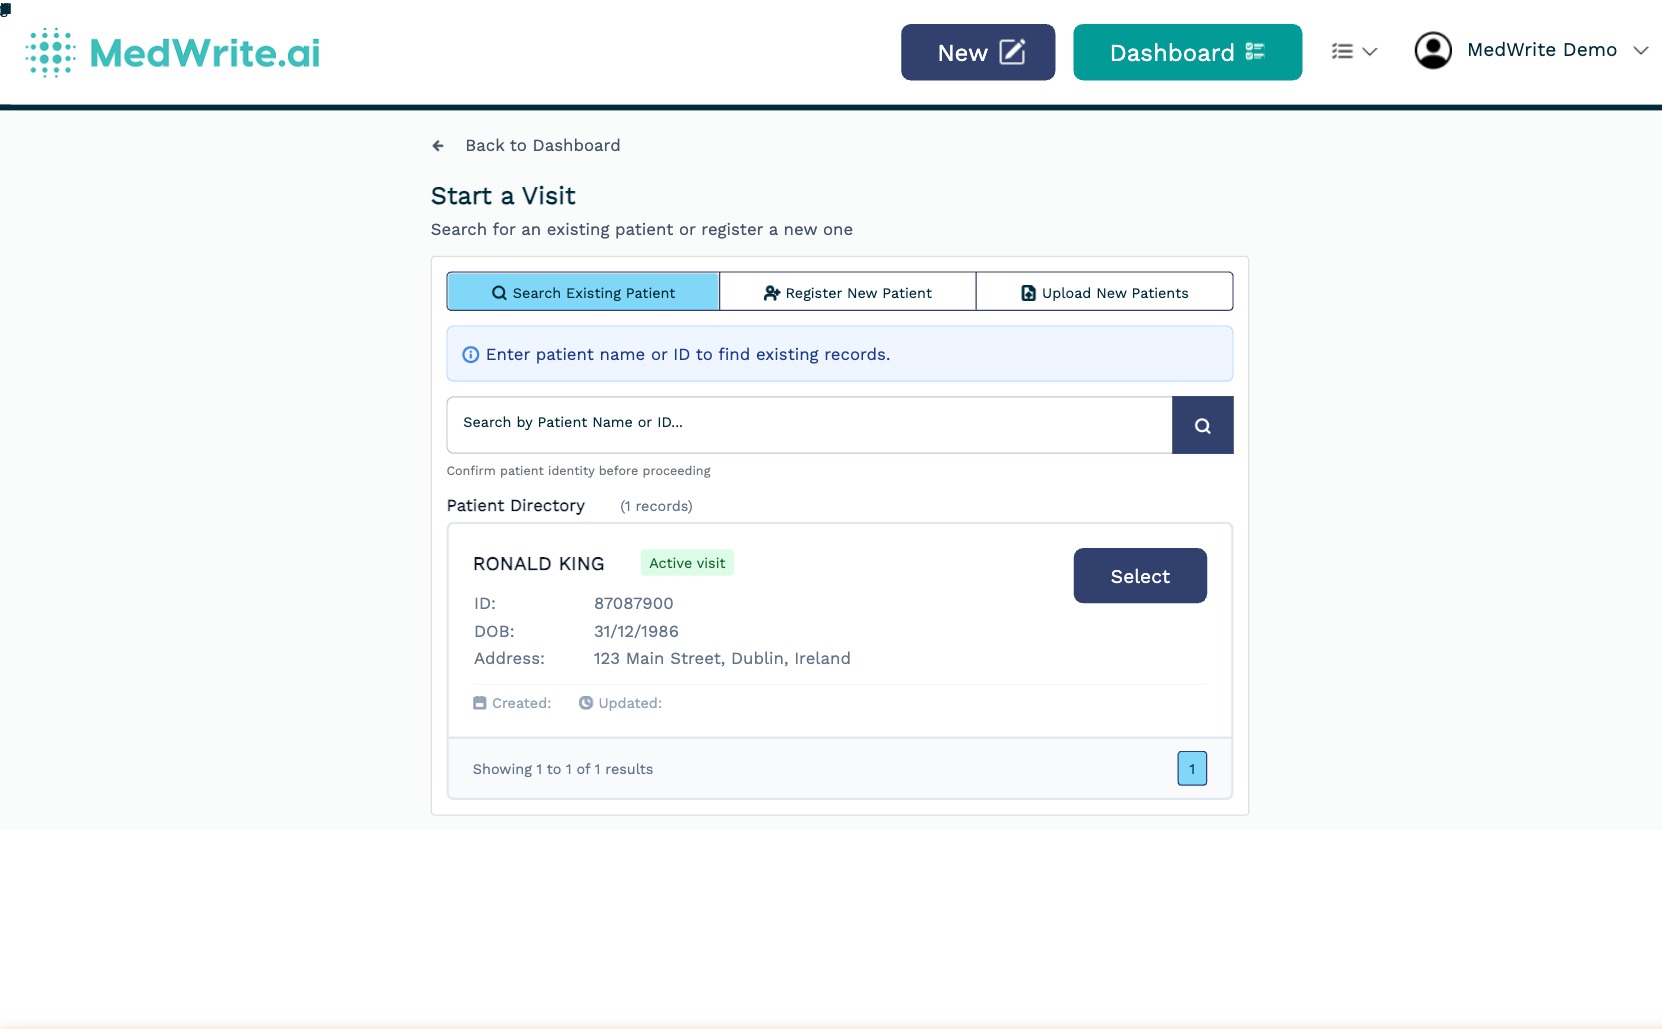
A dedicated space to manage all your patients in one place. View patient history, associated letters, and quickly navigate to any record from a single unified dashboard.
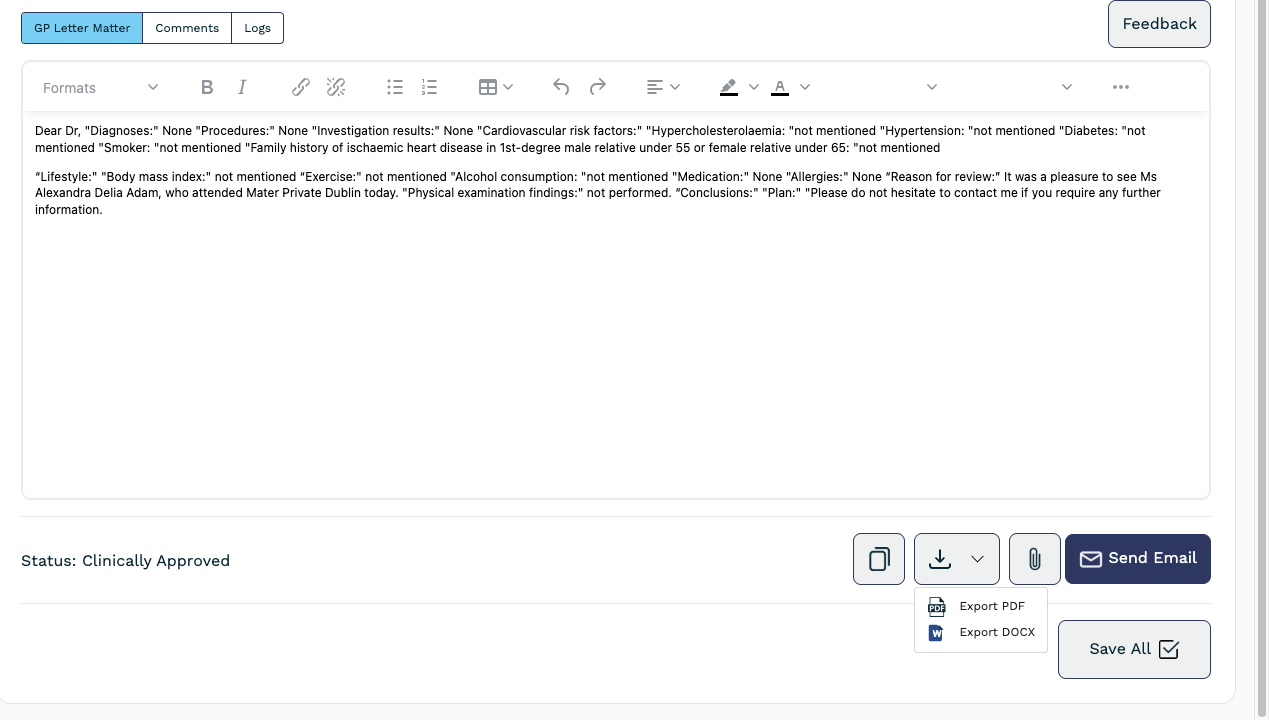
Export any letter directly as a polished **PDF** or **Word document (.docx)** with a single click - ready to send, print, dowload or attach to your EHR system.
## 🔧 Improvements & Fixes
Reduced average letter generation time by 30% through optimised AI pipeline processing.
Enhanced processing for low-quality or background-noise recordings - better transcription accuracy in challenging environments.
Polished editor layout, improved button placement, and cleaner typography across the record view.
Resolved edge cases causing occasional freezes during letter regeneration and status transitions.
Login sessions now persist correctly across browser restarts - no more unexpected logouts mid-session.
# #Issue 1 - Jan Changelog
Source: https://docs.medwrite.ai/essentials/january-2026
New features and improvements

## Feature Highlights
This release lands with a major focus on reliability, a new AI safety layer, and meaningful UX improvements across the board.
## 🚀 New Features
Significant under-the-hood improvements making MedWrite faster and more resilient - reduced load times, fewer interruptions, and a smoother experience throughout.
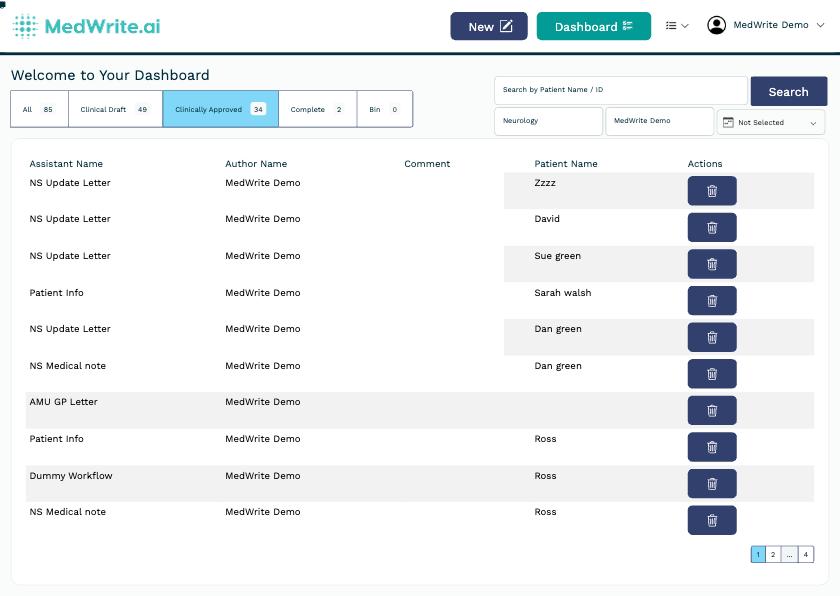
Every AI-generated letter now displays a clear safety banner reminding clinicians to fully review the content before clinically approving and sending. Patient safety, built in.
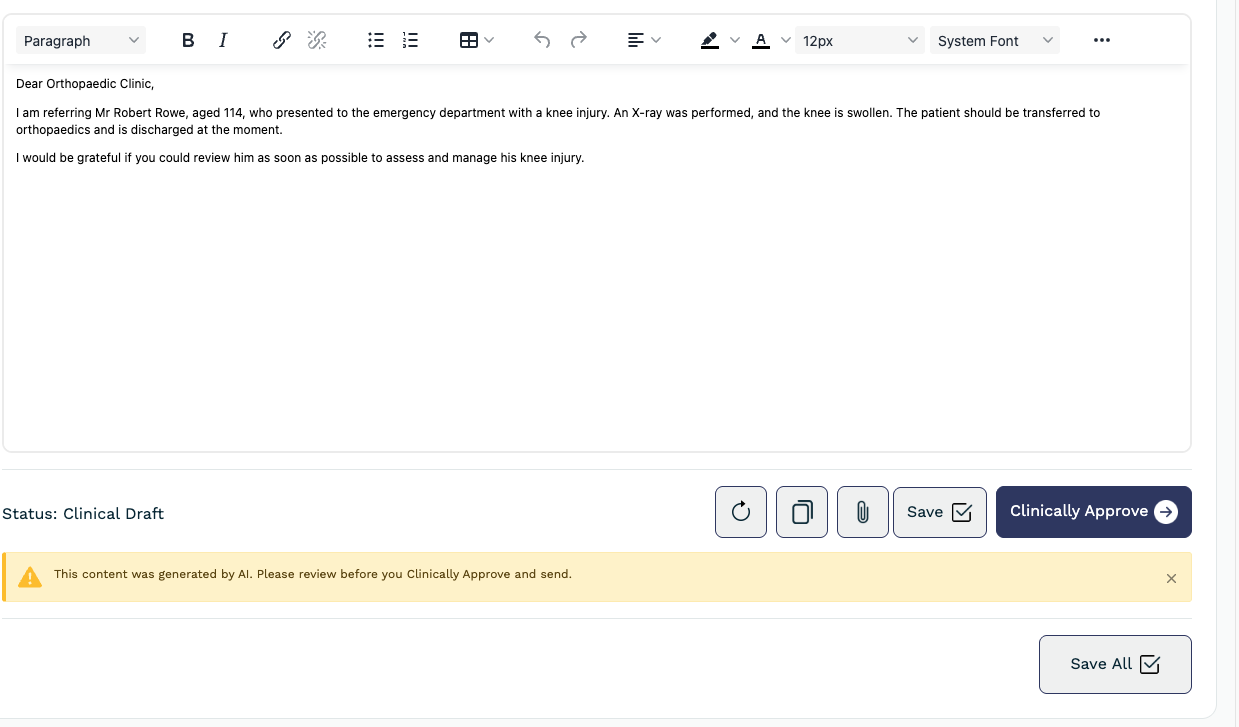
Attach supporting documents directly to any letter - PDFs, referral forms, and clinical files stay linked to the right record.
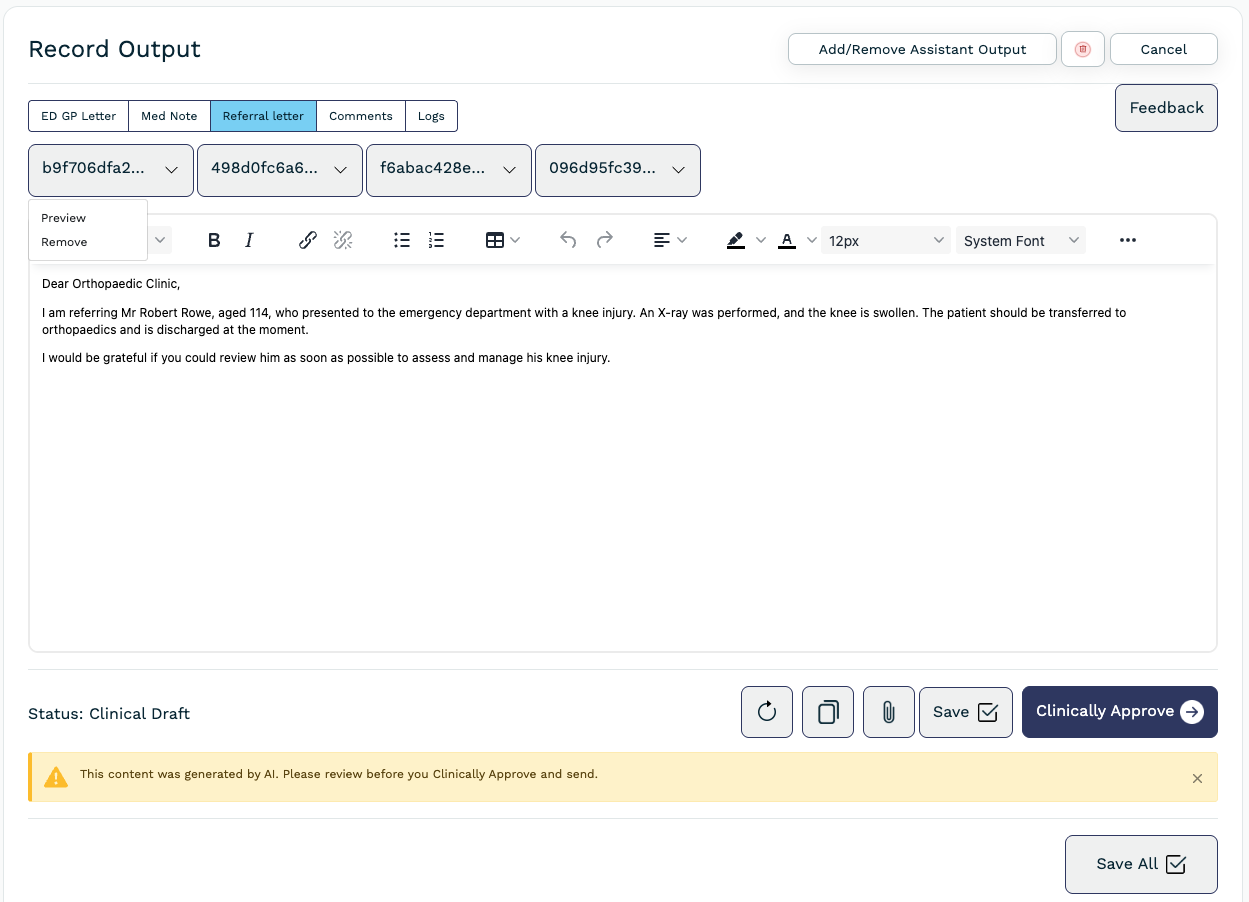
A refreshed interface with cleaner layouts, better visual hierarchy, and improved navigation.

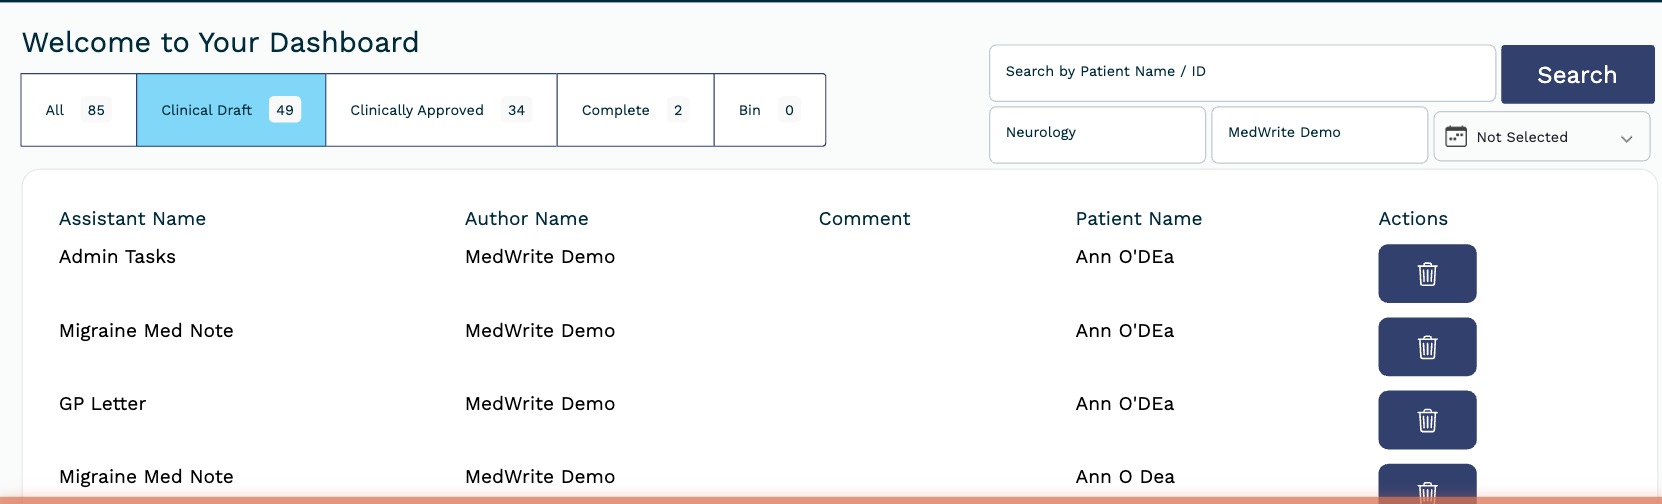
Quickly find any patient by name or ID directly from the dashboard — with clinic and consultant filters.
# #Issue 6 - June Changelog
Source: https://docs.medwrite.ai/essentials/june-2026
New features and improvements
## Feature Highlights
**AI Assist** introduces powerful inline editing tools directly within the clinical letter output screen, allowing clinicians to refine generated content without leaving the page. Clinics can now configure **Optional Workflow Steps** to create more flexible approval processes, while a new **Resizable Output Panel** gives users more space to work with detailed clinical documents.
## New Features
AI-powered editing tools are now available directly within the clinical letter output screen. Instantly shorten, expand, or refine generated letters without leaving the page. Save and Save All actions make it easy to preserve your changes as you edit.
Documentation workflows are now more flexible. Clinic administrators can insert optional approval stages, such as an administrative review, without forcing every record through the same process. Role-based permissions ensure that only the appropriate users see each step.
Resize the clinical letter output panel to suit your workflow. Whether you're reviewing long discharge summaries or detailed clinic letters, you can quickly expand the workspace for a more comfortable editing experience.
## Improvements and Fixes
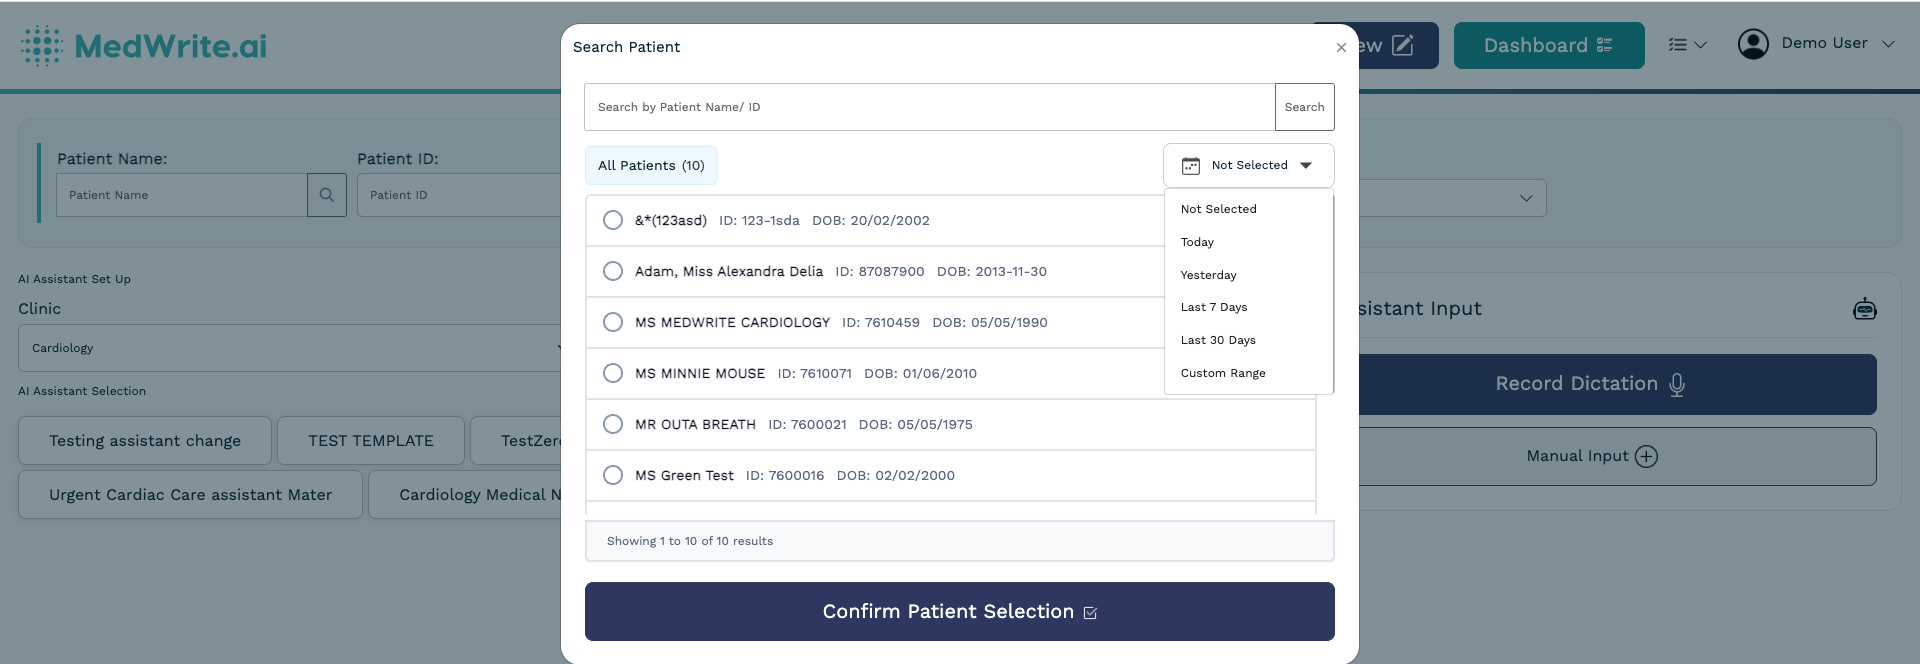
After importing a patient CSV, MedWrite now automatically opens the Search Existing Patient screen with a date filter showing only the newly imported patients. This makes it much faster to verify successful imports.
A confirmation message now appears before leaving a page containing unsaved recorded audio, helping prevent accidental loss of recordings.
Creating and editing workflows is now more reliable. Navigation after saving has been improved, and manual input is correctly restored after cancellations or timeouts.
If AI generation takes longer than expected, MedWrite now recovers gracefully by preserving your transcript and allowing you to continue without restarting the recording.
Recording sessions now recover more smoothly after temporary internet interruptions. Controls return to their correct state automatically so clinicians can continue recording without refreshing the page.
Checkbox selections within clinical output forms are now saved correctly when completing a letter, ensuring no information is lost during finalisation.
Clinical letters can now be exported directly as PDF files from the output screen, making it easier to download and share completed documents.
The Not Selected filter in the Not Started dashboard now displays records correctly, and updates to user or organisation settings take effect immediately without requiring a page refresh.
# Manage Assistants
Source: https://docs.medwrite.ai/essentials/manage-assistants
View and manage your AI assistants
Manage assistants from one place. You can see all assistants, edit their settings, or disable them when they are not needed.
Open the assistants section to see every assistant in your organisation. Each entry shows the name, linked template, and whether it is active.
Open an assistant to change its name, template, or other settings. You can disable an assistant so it no longer appears when creating records.
## Next steps
Create an AI assistant for your clinic or letter type.
Update an existing assistant's settings or template.
# Manage Patients
Source: https://docs.medwrite.ai/essentials/manage-patients
View and manage patient information in MedWrite
Patient management lets you see and update patient details, link them to records, and keep information consistent across letters. From the dropdown beside your name click on "patient Manager" You will see 3 tabs, Search Existing Patient Register New Patient, and upload new patients.
**Search Existing Patient**
From here you can view and search for your patients.
**Selected Patient**
After you select a patient, you can see their information or create a **visit**. **Visits** are what makes patients available to specific Clinics. Select a clinic and visit date to make this patient available to a clinic.
You can also edit a patient's information from here by clicking update.
**Register New Patient** There are 2 ways to Register New Patients\*. One is manually by clicking the Register New Patient Tab, or by uploading a CSV containing the patient information.
You can download an example of the CSV in the upload new patients tab.
\*Not Including EHR Integrations
## Next steps
Create a new record for a patient.
Find a patient by name, ID, or other details.
# Manage Templates
Source: https://docs.medwrite.ai/essentials/manage-templates
Create and manage letter and document templates
Templates define how your letters and documents look. Each template can use **variables**: placeholders for **dynamic** patient or letter **data** (names, dates, clinic, letter content, and other fields). MedWrite fills those placeholders when the PDF or Word file is generated so every letter stays on-brand but the **details change** per patient and visit.
Open **Template Management** (`/pdf-management`). Filter by **Organisation**, **Document type**, **Clinic** (all clinics or one clinic), and **PDF** / **DOCX**. Use pagination if needed. Each card shows organisation, optional clinic, and dates.
Click on the eye icon to view template, this will allow you to see what the template will look like.
Click the **pencil** icon to open the **HTML Content Editor**. Use **Variables** to choose which **dynamic fields** appear in this template. Use **Run** (with optional sample data), **History**, and **Publish Template** when you are ready.
## Next steps
Add a PDF template for letter output.
Add a Word template for letter output.
# #Issue 3 - Mar Changelog
Source: https://docs.medwrite.ai/essentials/march-2026
New features and improvements

## Feature Highlights
**Bulk Operations** let clinic managers create visits for multiple patients at once. A new **Reports Dashboard** gives clinical leaders real-time KPIs on documentation activity. Voice transcription gets three upgrades: **live streaming**, **ambient detection**, and **Arabic-English bilingual** support.
## New Features
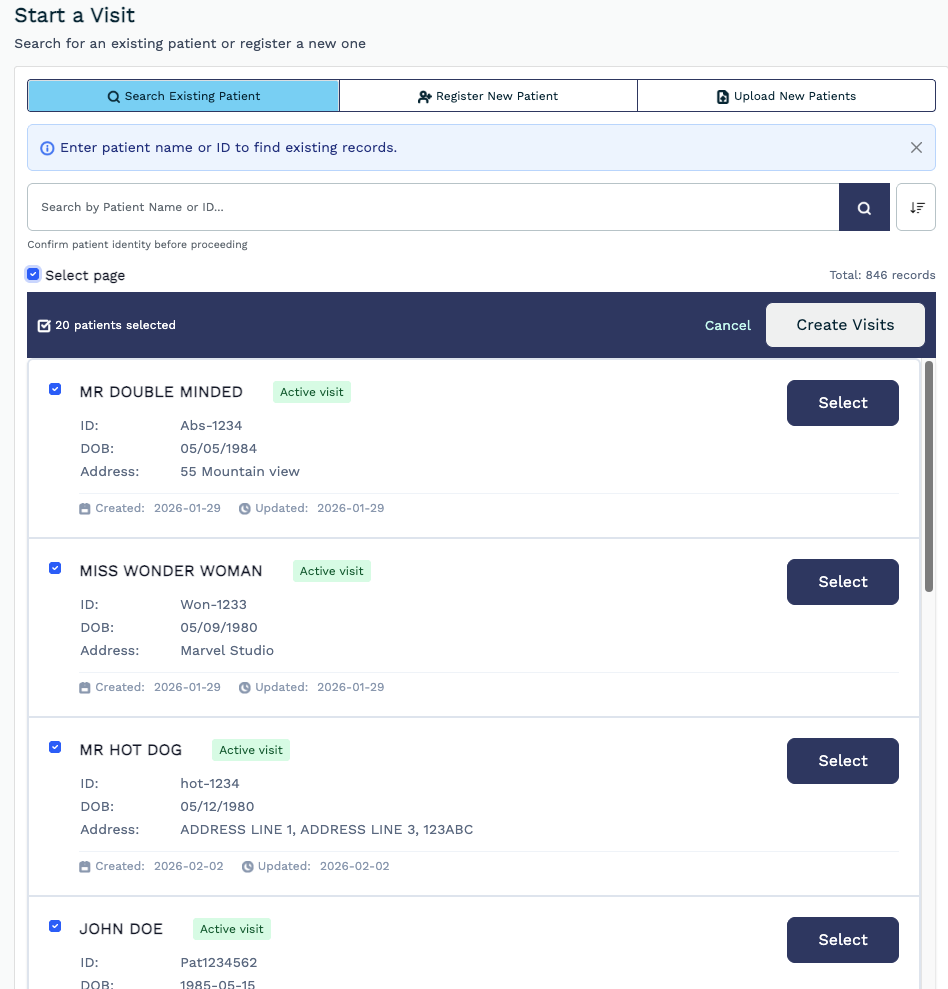
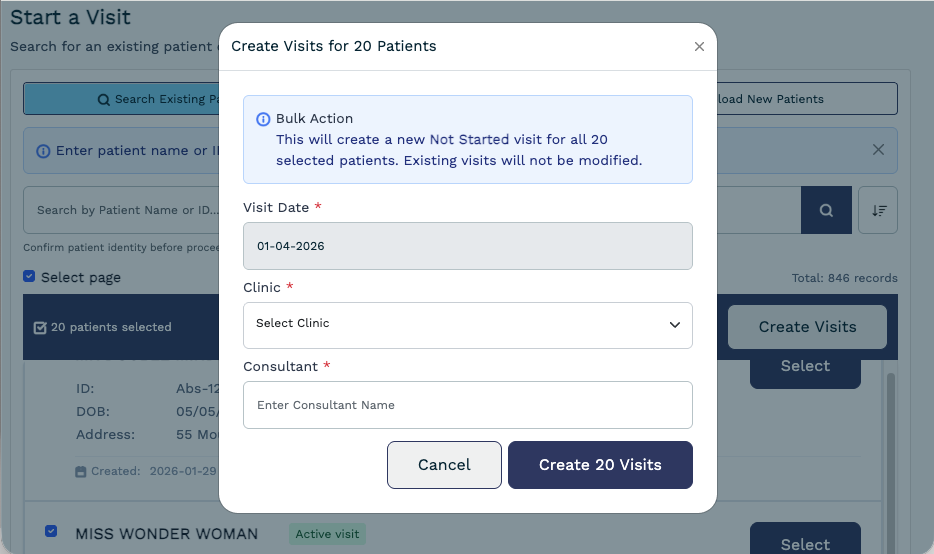
Create visits for multiple patients in a single action. Select patients from your list, assign a visit type, clinic, and consultant, then batch-create. No more one-by-one data entry for clinic setup or end-of-day closures.
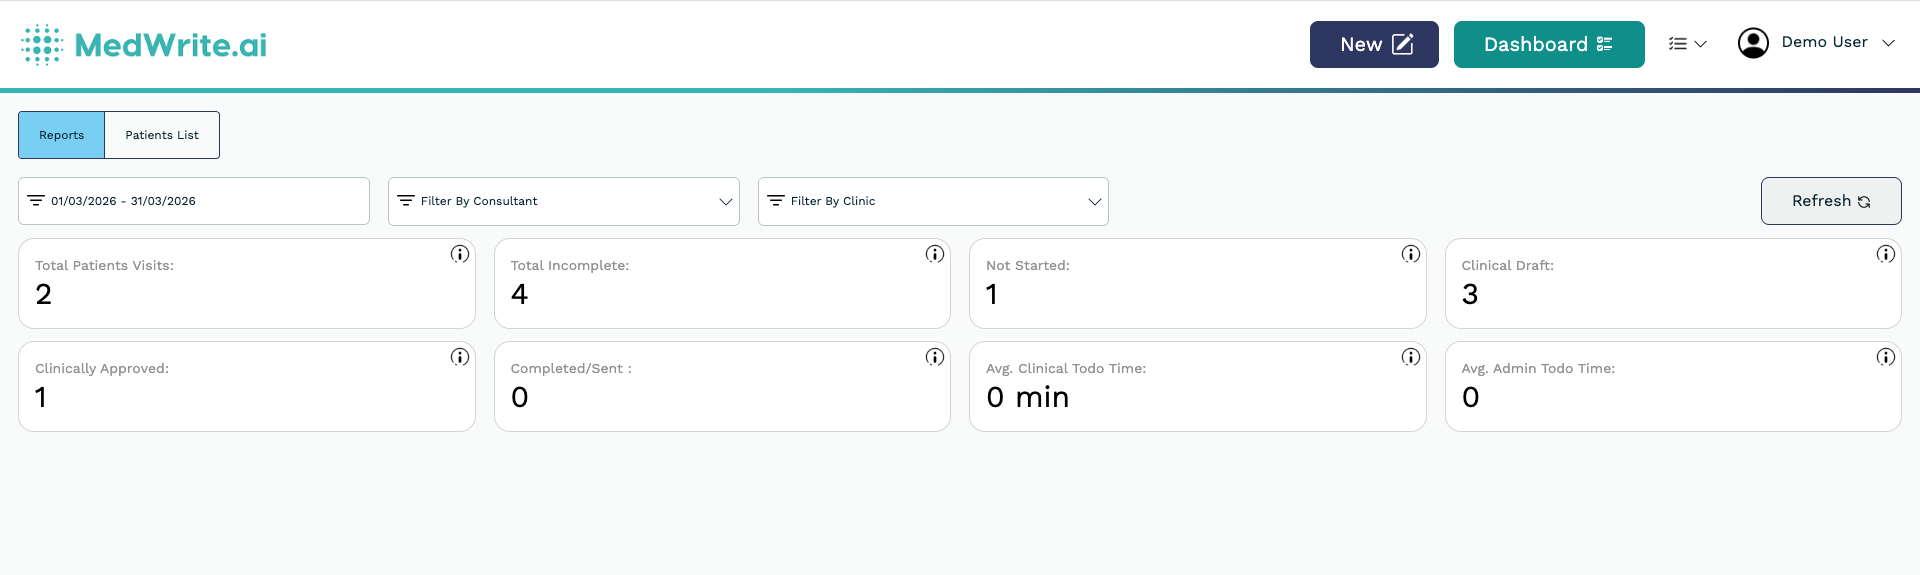
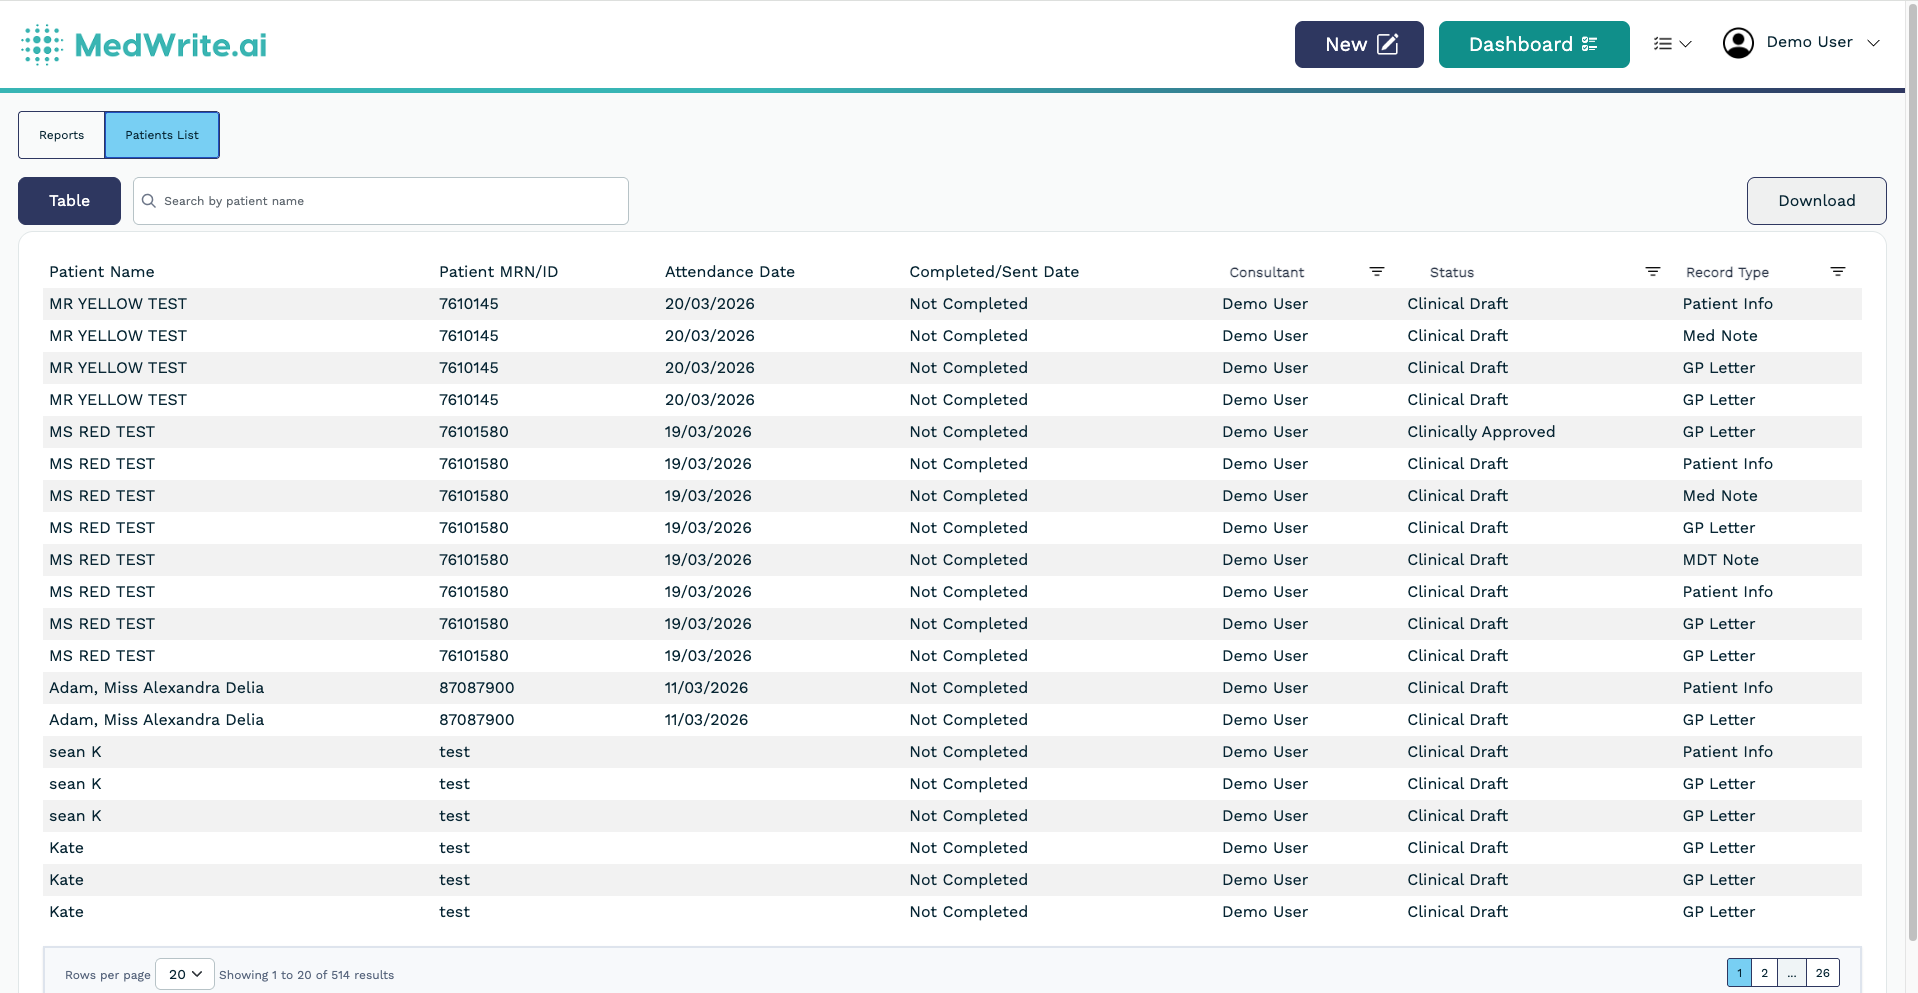
A new tabbed view separating Reports from Patient Management. KPI tiles for patient volume, wait times, admission rates, and discharge metrics - each with a tooltip explaining what it measures. Filter by clinic, consultant, and date range with live updates.
Three capabilities now production-ready:
* **Streaming transcription** - see your clinical notes form in real-time as you speak. No waiting for upload.
* **Voice Activity Detection** - recording starts and stops automatically based on speech. Less tapping, more documenting.
* **Arabic-English bilingual** - code-switching support for clinicians who move between languages during consultations.
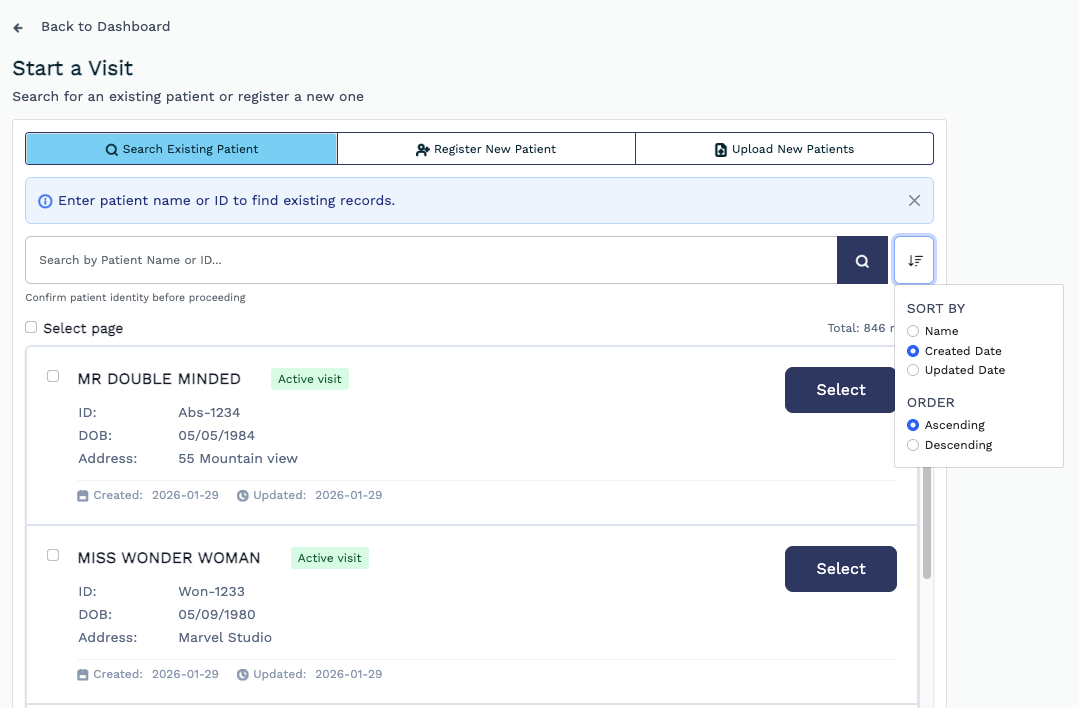
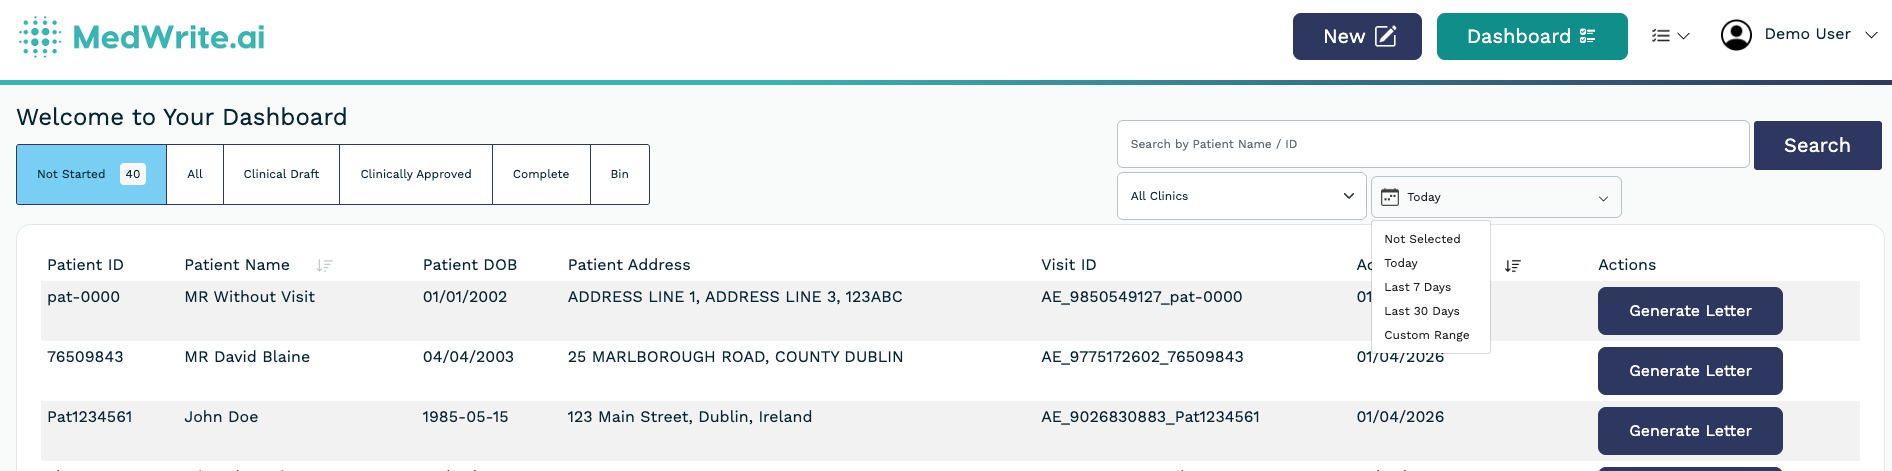
Sort patient lists by name, date created, or admission date. The default lookup now shows all patients (previously filtered to today only). A new date filter on the "Not Started" list helps admins triage pending workflows by day.

## Improvements and Fixes
Custom fields now display correctly on mobile, PDF attachments preview properly, and multi-file uploads work on mobile devices. A new filter indicator also shows which date range is active on each screen.
New rules enforce safe document handling: maximum 5 attachments per record, 5 pages per PDF, and file type validation - with clear error messages when limits are exceeded.
Filter behaviour is now consistent across Not Started, letter-status, and Bin tabs. A dedicated filter functionality on the Not Started tab makes it easier to find pending work.
Duplicate patients are now detected during bulk upload. Insurance records correctly displayed. Patient names refresh properly after bulk operations.
PDF preview now works on mobile. Multi-file uploads succeed even when one file fails validation. DOCX template formatting issues resolved.
Email sending failures now show specific & clearer error messages instead of failing silently.
# Mark as Complete
Source: https://docs.medwrite.ai/essentials/mark-as-complete
Mark a record or letter as complete when you have finished with it
Mark as complete lets you close the loop on a record or letter so it is clearly finished and no longer in progress.
Use **Mark as complete** when you have reviewed the letter, made any needed edits, and are ready to treat it as done. This keeps your dashboard and Record status up to date.
The record or letter moves to the completed state. You can still open it to view or export, but it will no longer appear in your in-progress list.
/
## Next steps
Review and clinically approve your letter.
Send approved letters by email.
# #Issue 5 - May Changelog
Source: https://docs.medwrite.ai/essentials/may-2026
New features and improvements
## Feature Highlights
**Assistant Library** gives doctors full control over their clinical AI workflows — browse available templates, activate the ones they need, and manage them without admin help. Hospitals using **MediTech** can now import appointment lists directly into MedWrite. A new **Custom Workflow Steps** feature allows clinics to tailor documentation flows to their specific procedures.
## New Features
Doctors can now manage their own clinical AI workflows from a self-service library. Browse available assistant templates, activate the ones relevant to your specialty, and customise settings — all without waiting for an administrator. Role-based limits keep the system organised as your team scales.
Hospitals running MediTech can now export patient appointment lists and upload them into MedWrite. Scheduled visits are pre-populated automatically, removing manual data entry during clinic setup.
Add extra steps to your clinical documentation workflows. Tailor the sequence to match how your specialty or department actually works — no more forcing every clinic through the same fixed process.
## Improvements and Fixes
Users can now switch between streaming transcription and shorthand mode at the individual level. Choose the recording style that best suits your workflow. The system defaults to your organisation's setting until you select your own preference.
Multiple improvements have been made to recording session stability, including better connection handling, smoother error recovery, and fixes for edge cases that could interrupt active recording sessions.
# Record Consultation
Source: https://docs.medwrite.ai/essentials/record-consultation
Record a patient consultation on the mobile app
On the mobile app you can record a consultation so MedWrite transcribes it and helps generate the letter. Start a recording when you are with the patient, then review and edit on the app or web.
Open the app and start a new record. Tap to begin recording and speak as you would during the consultation. The app captures the audio and sends it for transcription.
When you stop the recording, the app processes the audio. You can then review the transcript and the generated letter, add edits, and approve or send from the app.
Record in a quiet place when possible so the transcription is accurate. You can edit the transcript and letter before approving.
## Next steps
Clinically approve records from the mobile app.
Review records and letters on the mobile app.
# Review Later
Source: https://docs.medwrite.ai/essentials/review-later
Mark a record or letter for review later
Review later lets you flag a record or letter so you can come back to it. Use it when you do not have time to approve or edit right away but want to find it easily later.
When viewing a record or letter, use the **Review later** option (or similar). The item is added to your review-later list.
Open the review later list from the dashboard or app. You will see all records and letters you marked. Open one to review, edit, and approve when you have time.
## Next steps
Review records and letters on the mobile app.
Clinically approve records from the mobile app.
# Review Record
Source: https://docs.medwrite.ai/essentials/review-record
Review and clinically approve your letter, then export as PDF or Word
After you create a record, you are taken to the letter page to review the output. Follow these steps to review and clinically approve your letter.
After you create a record you are directed to the letter page. There you can view or edit the letter. The page shows patient details, the record you captured, the transcript of the record, and the **Record output** (which depends on the assistant you selected).
When you create a letter, a reminder appears. It tells you that the content was generated by AI and that you need to review it before use.
To adjust the output, press the **AI Assist** button (magic‑wand icon) in the letter toolbar. You can:
* **Make it shorter**
* **Make it longer**
* Or type your own instruction (for example, "use a formal tone") and press **Refine**.
Select part of the text first to have the AI focus on that section. Use **Undo** to revert, and **save** before you clinically approve.
When you have reviewed the letter and are happy with it, press **Clinically approve**.
On the letter page you can **add audio** if you forgot something, then press **Regenerate** to update the letter with the new content.
## Next steps
Export approved letters as PDF or Word from the dashboard.
Mark the record or letter as complete when you have finished with it.
# Review Records
Source: https://docs.medwrite.ai/essentials/review-records
Review records and letters on the mobile app
On the mobile app you can open and review your records and letters. Edit the content if needed, then approve or mark as complete when you are done.
Open the records or letters section in the app to see your list. Tap a record to open it and view the transcript and generated letter.
Edit the letter text in the app as you would on the web. When you are happy with it, use **Clinically approve** or **Mark as complete**.
## Next steps
Clinically approve records from the mobile app.
Search for records or letters on the mobile app.
# Search Records
Source: https://docs.medwrite.ai/essentials/search-records
Search for records or letters on the mobile app
Use search on the mobile app to find a specific record or letter. You can search by patient name, date, or other details depending on what the app supports.
Open the search field in the app (often at the top of the records or dashboard screen). Type the patient name, date, or keyword to see matching records.
Tap a result to open that record or letter. You can then review, edit, or approve it from the app.
## Next steps
Review records and letters on the mobile app.
Mark a record or letter for review later.
# Send Email
Source: https://docs.medwrite.ai/essentials/send-email
Send approved letters by email from MedWrite
You can send approved letters by email directly from the dashboard. This is useful for sending to GPs, patients, or other recipients. Medwrite does not automatically have this it will need to be configured with an organisation email.
From the clinically approved section, open a letter and use the option to send by email. Enter the recipient address and add a message if needed.
The letter PDF is attached to the email. The recipient receives the letter and any note you added.
## Next steps
Review and clinically approve letters before sending.
Mark a record or letter as complete when finished.
# Update Assistant
Source: https://docs.medwrite.ai/essentials/update-assistant
Update an existing AI assistant's settings or template
Update an assistant when you want to change its name, template, or how it generates content. Changes apply to new records that use that assistant.
From the assistants list, open the assistant you want to update. You will see its current name, template, and any other options.
Edit the fields you need (for example template or output format) and save. New letters created with this assistant will use the updated settings.
## Next steps
View and manage your AI assistants.
Create an AI assistant for your clinic or letter type.
# Get Approved Outputs
Source: https://docs.medwrite.ai/get-approved-outputs
Retrieve a paginated list of approved clinical outputs (letters) as an HL7 FHIR Bundle
Retrieve a paginated list of approved clinical outputs (letters) for the authenticated organisation. The response is an HL7 FHIR Bundle of Composition resources, each containing the letter content and an embedded PDF.
All endpoints require authentication. For credentials and access, contact the **medWrite team**.
## Request
```
GET {{baseUrl}}/api/v1/third-parites/letters/
```
## Headers
| Header | Type | Required | Description |
| ------------ | ------ | -------- | -------------------------------------------- |
| Bearer Token | string | Yes | Authentication token. Contact medWrite team. |
| API Key | string | Yes | Service API key. Contact medWrite team. |
## Query parameters
| Parameter | Type | Required | Default | Description |
| --------------- | ------- | -------- | ------- | ---------------------------------------- |
| Speciality ID | string | No | — | Filter outputs by speciality identifier. |
| Speciality Name | string | No | — | Filter outputs by speciality name. |
| Page Size | integer | No | `1` | Number of outputs per page. |
| Page Number | integer | No | `1` | Page number for pagination. |
| Sort Order | string | No | `desc` | Sort by creation date. `asc` or `desc`. |
## Response
**Status:** `200 OK`
```json theme={null}
{
"data": {
"resourceType": "Bundle",
"type": "collection",
"entry": [
{
"resource": {
"resourceType": "Composition",
"id": "...",
"status": "final",
"subject": { "reference": "Patient/..." },
"date": "2025-01-15T10:30:00Z",
"section": [
{
"title": "...",
"id": "